I am probably the last person in America to jump on the chalk paint bandwagon, but I was finally convinced by the overwhelming cuteness of all the projects I’d seen on Pinterest and at our local “pickers” shop. I had to try it!
The cost of the name-brand chalk paints, however, was not so cute.
My first inclination is always to try to do it myself, but I’m not completely insane, so I googled whether other people had already figured out how to make their own chalk paint. Had they ever. Oh happy day!
There is no shortage of recipes out there using latex paint plus unsanded grout, plaster of paris, baking soda or chalk (or some combination of them). I decided to try the one using calcium carbonate powder (found here), which is – you guessed it – chalk. You can order this on Amazon for less than $10.
I didn’t have any flat latex paint laying around, so I bought a gallon of Walmart brand flat latex for $12, I believe. Did you know that Walmart will color match paints just like the big home improvement stores? Yeah, baby! I brought them a swatch of a cute blue from one to the expensive brands, and they matched it beautifully. I also bought a flat white, since I was toying with painting my dining room chairs white. I intentionally bought the cheapest paint I could find, figuring that results could only improve from there using better quality paints. Right? Right.
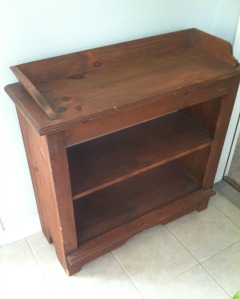
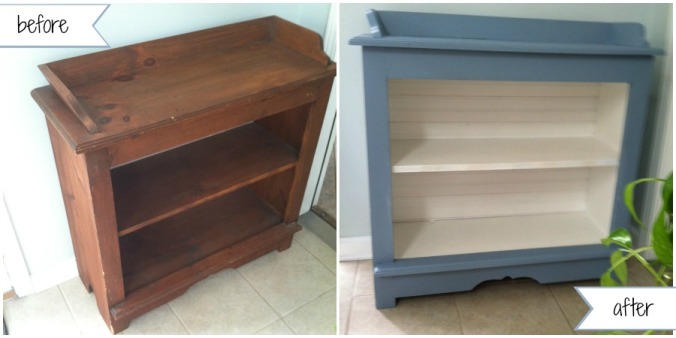
I’ve had this sad little shelf since my single days. It held my tv at one point and plants and books at another. It was sitting, forlornly, on my brother’s front porch when I rescued it this summer. It fit perfectly on one wall in our sunroom, and I thought it would be a great piece to experiment on, being old and not valuable in it’s current state. So what the heck. Nothing to lose.
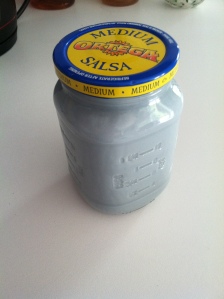
I used an old salsa jar to mix the paint in. It’s super convenient, because the jar is pre-marked with measurements (who wants to try to pour paint from a gallon can into a one cup measure and then into a mixing container?) and is wide-mouthed to make getting a paint brush in and out easy. Worried that the marks might have just been decorative, I doubled checked beforehand by pouring one cup of water in… and whaddayaknow? The marks were accurate. Just when you lose all faith in humanity, something comes along to restore it. 🙂
I first mixed 2 tablespoons of chalk powder into 1 tablespoon water and stirred to dissolve well and then added 1 cup of flat latex paint (I filled it to the 1 cup mark, figuring 3 extra tablespoons wouldn’t make much difference in volume). I gave the jar a really good shake (top on, of course) to dissolve the chalk mixture into the paint and got to work with an old, narrow paintbrush.
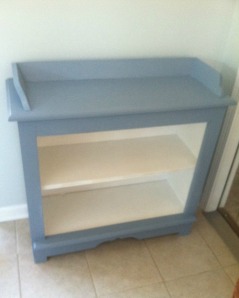
I don’t know how real chalk paint is supposed to feel, but this went on very creamy and smooth. After the first coat, I noticed that some of the brown finish on the shelf was bleeding through, so I had to go back over it all with a primer. I’ve read that one advantage of chalk paint is that you don’t have to do a lot of prep work, like sanding, but you’ll have to prime if there is this sort of “primitive” brown stain on your piece… word to the wise. After that coat of primer, I put on another two coats of the blue chalk paint around the outside and decided to paint the inside white.
The cheap white paint did not cover nearly as well as the cheap blue paint, and the inside required 3 coats. I honestly didn’t mind painting so many coats, because the chalk paint went on easily, dried quickly and cleaned up easily. The shelf, as it was, had no backing, so I bought a pack of beadboard wainscotting at Lowes for around $9, painted the pieces white, cut it to size and tacked it onto the back to finish it all off.
There is much debate whether soft wax or water-base poly is best to finish off chalk paint (google it when you’re bored – tons of reading on that one!), and I decided on wax. I wasn’t about to spend a lot of money on the name-brand wax any more than on the name-brand paint, so I bought a soft wax at Lowes for about $10 (?). Minwax, I believe. It’s pretty easy (if smelly) to apply, and you buff it to a shine after it sits for about 10-15 minutes. My husband let me use the power buffer he has for his car, which made the job wicked easy. Piece of cake! I went over the areas the waxer/buffer thingy couldn’t reach with an old t-shirt and called it a day.
What do you think? Much cuter, n’est-ce pas? (pardon the horrible photography – I use my cell phone for pics until I can afford a real camera… we make do around here, girls!) …and again (so cute!)
- 2 gallons of paint ~$25
- calcium carbonate (chalk) powder $10
- soft wax ~$10
- beadboard wainscotting for backing ~$10
I could not have bought the finished shelf for $55 where I live. That might seem like a lot of money as-is, but the name-brand paints and wax would have come to over $100, I believe (at about $35 per). I also have a ton of paint and wax leftover for future projects! The Walmart “gallon” was 124 ounces (a real gallon would be 128 ounces, so it’s been hit by the Amazing Retail Shrink Ray), which would still leave paint for 30 more projects, and it can always be custom mixed (by me) to make different colors. I only used about half of my original diy mix for this project, so a little goes a long way!
I’ve already started on another table. I was curious whether I could use old satin and/or semi-gloss paints as chalk paint. I can. Stay tuned…


Impressive. I love the color. It looks so smooth, and look at the encouragement to find new projects with the left over material. Impressive, for sure. Makes me want to try it.
LikeLike
Fantastic! I have painting with chalk paint on my project list – I’ve never tried it either ( shhhh, don’t squeal on me) but your results are a great encouragement.
LikeLike
Thank you so much! Y’all should try it – it’s easy and a great way to spruce up old, boring furniture.
LikeLiked by 1 person
It is amazing how a little color can make something look awesome! What is your next DIY?
LikeLike
I’m working on a little side table for the sunroom… it’s actually done, but the blog posts take me a while to get together! 🙂 Thanks so much for checking in. I really love how easy it is to change the look of furniture with a bit of paint.
LikeLiked by 1 person